This exercise must be done on rpd’s which are deployed with the BI server is running
Aggregate persistence is used to automate the creation and
initial population of aggregate tables, persist them in backend
datawarehouse schema and configures the rpd file to use them wherever
its appropriate. This is best way to deal with performance issue in
datawarehouse tables for which intervention of ETL professionals is not
needed.
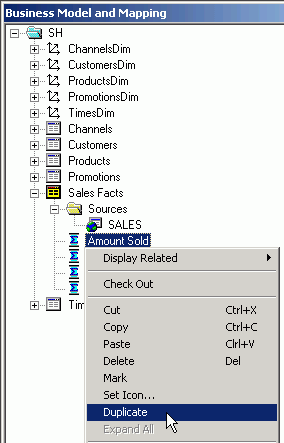
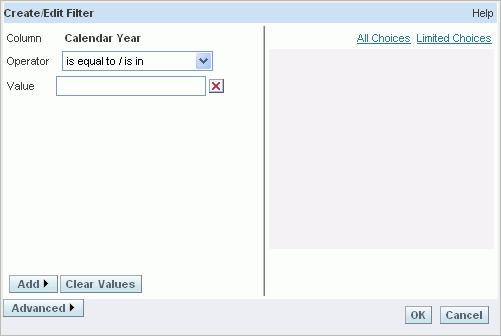
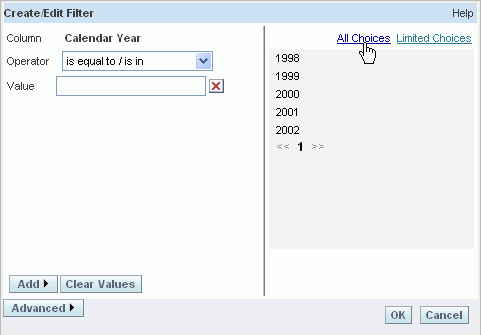
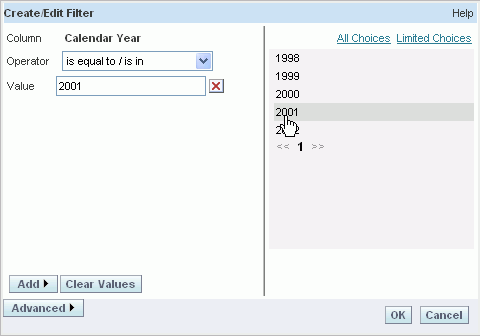
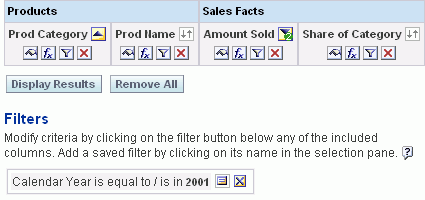
Here are the steps to create an aggregate where a frequent query is fired for SALE_PRICE,MONTH and MODEL

Open rpd in online mode and and open the Utilities, choose “Aggregate Persistence”

Provide a name and location for the script file to be created

Select the metrics required to be persisted

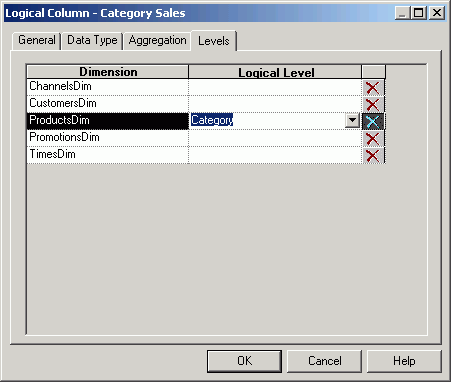
Select the dimension level of the attributes that needs to be persisted. Check the use of “Surrogate Keys”

Select the Database, the schema and the connection pool and then specify the name of the aggregate table .


The created script now appears and simultaneously the script file is also created.

Once and check the script contents

Navigate to D:\OBIEE11G\Oracle_BI1\bifoundation\server\bin
Check that nqcmd.exe is present. This is a utility from OBIEE to execute scripts.

Cd to D:\OBIEE11G\Oracle_BI1\bifoundation\server\bin in a command window.
Issue the command nqcmd –d coreapplication_ON863956460 –u admin –p mypassword123 –s c:\agg_persistence.sql
Note that the entry after –d switch is the name of the OBIEE DSN. (to checn this Start>run>type odbcad32)
-u is the administrator username
-p is the administrator password
-s is script path
Execute this command.

Once script executes, the command window displays the same as
Processed. Note, any errors in this stage is because of 2 reasons :
· BI Server is not running (opmnctl startall should be done) OR
· The script is taken from an rpd that’s not deployed (take script from a rpd in online mode)

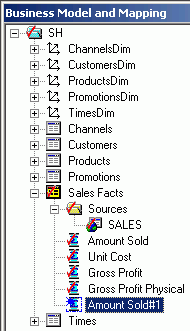
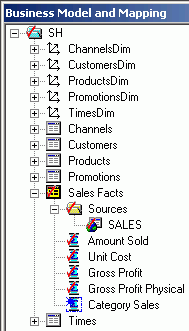
Once the script completes the changes done by it are visible.
· New tables are created in physical layer
· Same are created in Database as well
· New Logical table sources are created in BMM and mapped to respective columns

We can verify that column mapping to new LTS is done by opening the LTS’s created by the aggregate persistence wizard.
Notice that each of the objects created by aggregate persistence wizard in the rpd has a small “GEAR” symbol.


 We would like to depict this using a map as shown below.
 As
you see we have 2 visualizations applied on the same map. The first one
is a different color coding for each of the 3 states depending on the
sales performance. The other is a pivot representation of yearly
performance for each state, all within a single map.
As
you see we have 2 visualizations applied on the same map. The first one
is a different color coding for each of the 3 states depending on the
sales performance. The other is a pivot representation of yearly
performance for each state, all within a single map. Then
we need to restart the presentation service. This enables the
connectivity between BI EE and Mapviewer. After enabling the
integration, we then import the standard spatial
Then
we need to restart the presentation service. This enables the
connectivity between BI EE and Mapviewer. After enabling the
integration, we then import the standard spatial  We
start off with creating a simple Base Map called STATE_MAP which will
be using 2 out of the box themes THEME_DEMO_STATES and
THEME_DEMO_STATES_LINE
We
start off with creating a simple Base Map called STATE_MAP which will
be using 2 out of the box themes THEME_DEMO_STATES and
THEME_DEMO_STATES_LINE This step will enable us to render all the US States and its boundaries within a very simple map as shown below
 Once
the base map is created, lets create a new tile layer called
STATE_TILE_MAP which will use this base map for rendering. We can define
all the zoom levels, boundaries etc within the tile layer
Once
the base map is created, lets create a new tile layer called
STATE_TILE_MAP which will use this base map for rendering. We can define
all the zoom levels, boundaries etc within the tile layer
 Now
we have a map that can show all the US states and its boundaries. We
need to now expose this map to the mapviewer application (as an admin
user through Mapviewer admin screen) by taking it online as shown below
Now
we have a map that can show all the US states and its boundaries. We
need to now expose this map to the mapviewer application (as an admin
user through Mapviewer admin screen) by taking it online as shown below Now
the map is available for consumption through BI EE. Remember, the theme
that we used above, THEME_DEMO_STATES has an identifier called
STATE_ABBR which is basically the key that we need to pass from BI EE.
Relationship between BI EE repository columns/subject areas and
Mapviewer maps are done from the Manage Map Data screen in the
presentation services admin console.
Now
the map is available for consumption through BI EE. Remember, the theme
that we used above, THEME_DEMO_STATES has an identifier called
STATE_ABBR which is basically the key that we need to pass from BI EE.
Relationship between BI EE repository columns/subject areas and
Mapviewer maps are done from the Manage Map Data screen in the
presentation services admin console. In this screen, we need to import the layers, maps and the images that we want to include as shown below
 Edit
the THEME_DEMO_STATES theme and map the State column from the
repository. There need not be any relation between the column used in
spatial and the column mapped in BI EE. All we need to ensure is the
attributes should match. In my case, the State abbreviations come from
the SH schema and the THEME_DEMO_STATES come from STATES table in the
MVDemo schema.
Edit
the THEME_DEMO_STATES theme and map the State column from the
repository. There need not be any relation between the column used in
spatial and the column mapped in BI EE. All we need to ensure is the
attributes should match. In my case, the State abbreviations come from
the SH schema and the THEME_DEMO_STATES come from STATES table in the
MVDemo schema. Then navigate to the STATE_TILE_MAP in the background maps and add the THEME_DEMO_STATES again.
 This
establishes a relationship between the Subject Area and the Map thereby
enabling us to add the mapview from answers. After doing this, lets
create the report from the SH schema containing just the 3 states for 4
years.
This
establishes a relationship between the Subject Area and the Map thereby
enabling us to add the mapview from answers. After doing this, lets
create the report from the SH schema containing just the 3 states for 4
years. Use the new Map View option to create the map.
 This
will render the map that we created in mapviewer. If you notice
carefully, it will automatically apply some color coding to the 3 states
that are part of the report.
This
will render the map that we created in mapviewer. If you notice
carefully, it will automatically apply some color coding to the 3 states
that are part of the report. The
color coding is actually part of default visualization that Map Views
apply on a map. Lets change this to something as shown below
The
color coding is actually part of default visualization that Map Views
apply on a map. Lets change this to something as shown below Lets now create one more pie chart visualization (for obtaining the yearly breakup of sales in all the 3 states)
 Lets use the Year as the column providing the necessary slices for the pie charts
 This will give us the necessary visualization using Mapviewer.
 Though
there are a lot of steps involved, majority of the steps are for
setting up the mapviewer. Once we have the maps set up the entire
process of adding visualization to maps is quite straight forward.
Though
there are a lot of steps involved, majority of the steps are for
setting up the mapviewer. Once we have the maps set up the entire
process of adding visualization to maps is quite straight forward.